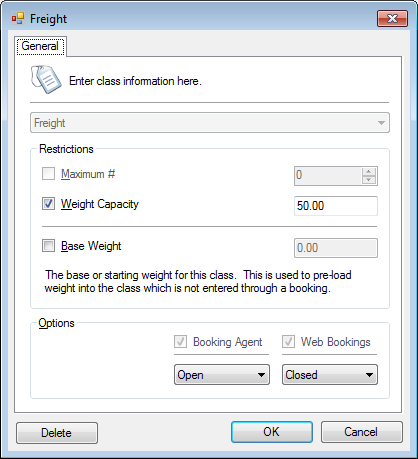
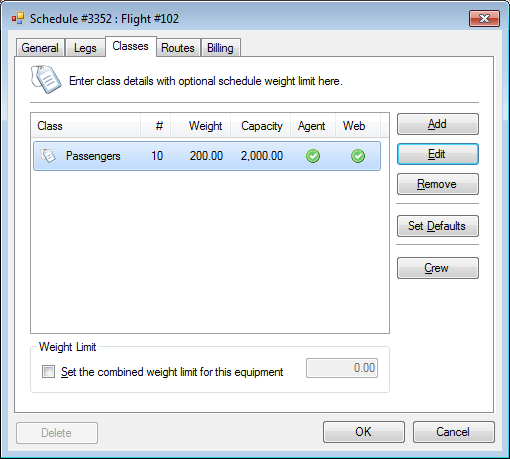
The classes define physical spaces which can booked on, such as passengers, freight and luggage.
» Core Concepts | Classes
Setup a class
- Click Classes tab.
- Click Add.
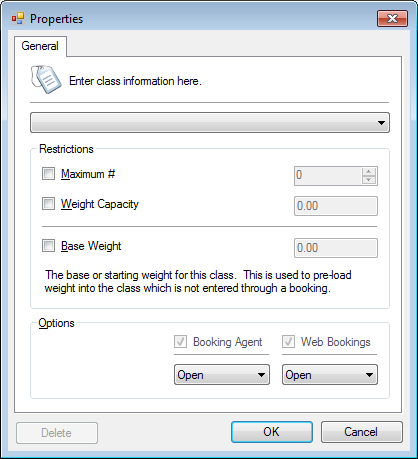
- Select a Class.
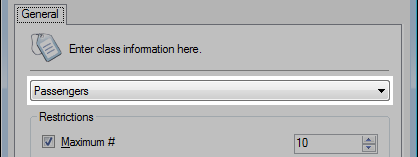
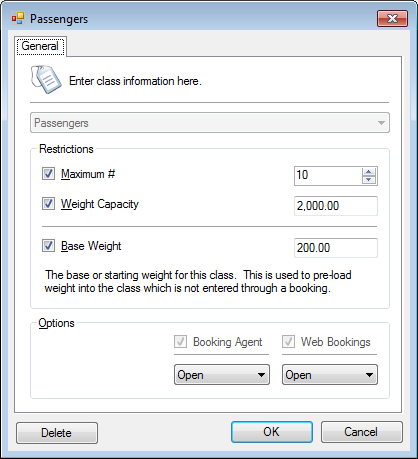
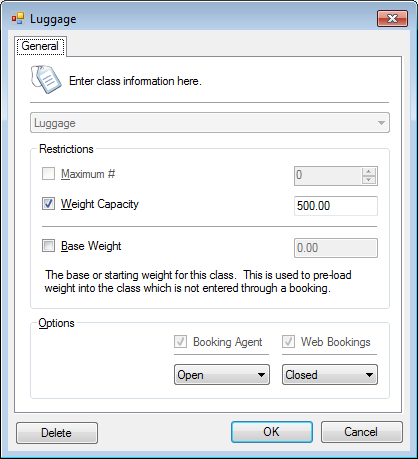
- Optional. Set Maximum #.
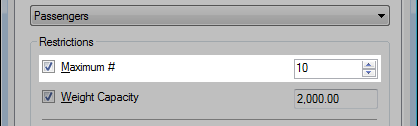
This is the maximum number of seats or spaces available for bookings made in this class. - Optional. Set Weight Capacity.
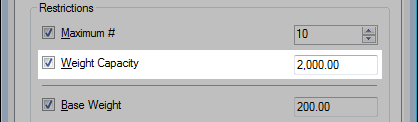
This is the maximum weight available for bookings made in this class. - Optional. Set Base Weight.
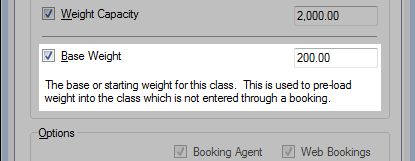
This is the base or starting weight of the class.
This is used to pre-load weight into the class which can be used for pilot weights. - Set Booking Options.
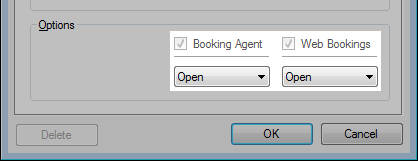
Options are Open, View Only and Closed.
- Click OK. The class has been added to the schedule.
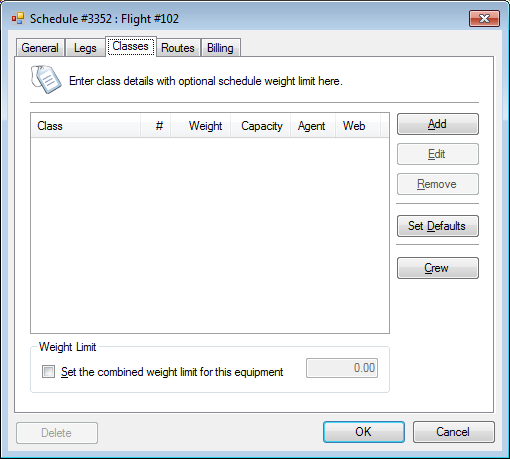
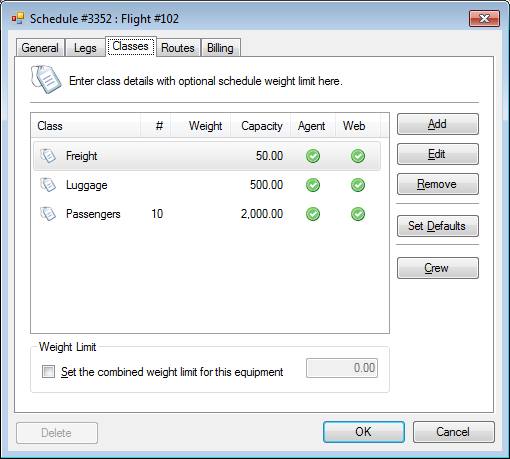
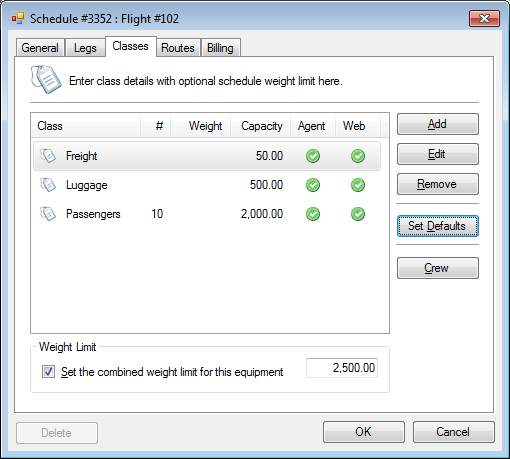
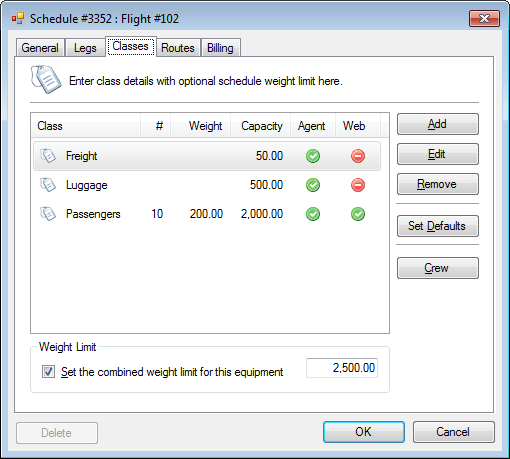
Set total weight limit
A schedule can have multiple classes, each with their own weight restrictions.
Setting an overall total weight limit for all the classes prevents the schedule from going over-weight. This does have the side effect that class weights can bleed into each.
- Click the Classes tab.
- Check Set the combined weight limit for this equipment and set the weight.
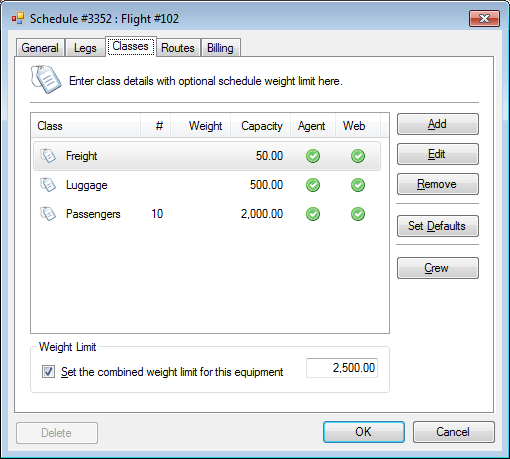
- Click OK.
Apply classes using the equipment
The equipment may be setup with pre-defined classes which can be easily applied to a schedule.
This can be useful when changing out equipment.
» Setup Equipment
- Click the General tab.
- Set the Equipment.
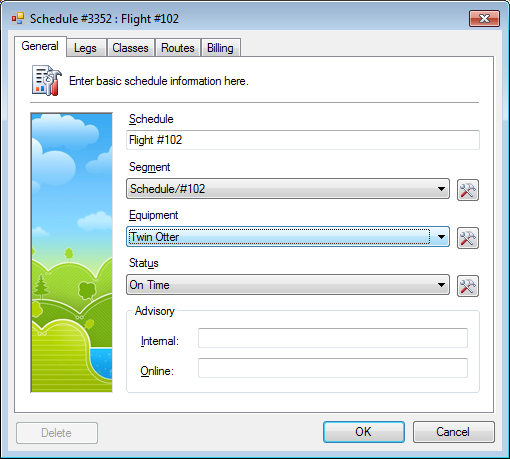
The classes may automatically update when changed depending on the settings of the equipment. - Click the Classes tab.
- Click Set Defaults.

- The list of classes will update.
Class examples
- Overview
- Passengers
- Luggage
- Freight