The status defines the category and business rules to apply to the schedule, state, booking or luggage.
Setup a schedule status
Examples
- On Time
- Delayed
- Cancelled
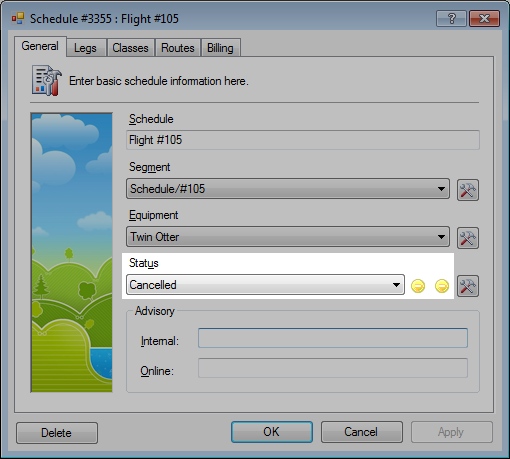
» Schedule anatomy | General
- Click Tools > Operations > Status > Schedules.
- Click <New Item> from the Status drop-down list.
- Enter the Status name.
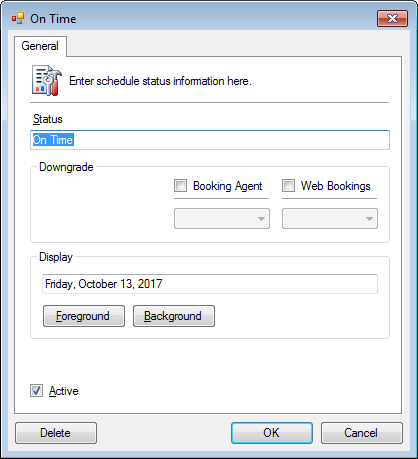
- Optional. Set the Foreground and Background colors in the Display section.
These color codings will show up in the Schedule tab and Find Availability. - Set the Active checkbox.
- Click OK.
Setup automatic downgrading of classes
When a status is changed, the classes can be automatically downgraded. This can be helpful for cancelled schedules to ensure they are no longer bookable.
- In the Downgrade box, set the maximum booking option level for the Booking Agent and/or Web Bookings.
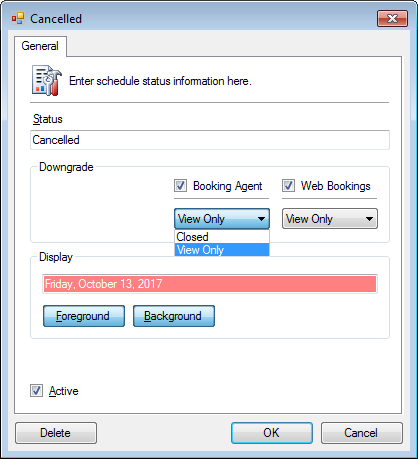
- Click OK.
In the schedule properties, there will be status indicators when active.
Setup a bookings status
Examples
- Confirmed
- Cancelled
- Waiting List
» Status in Booking anatomy
- Click Tools > Operations > Status > Bookings.
- Click <New Item> from the Status drop-down list.
- Enter the Status name.
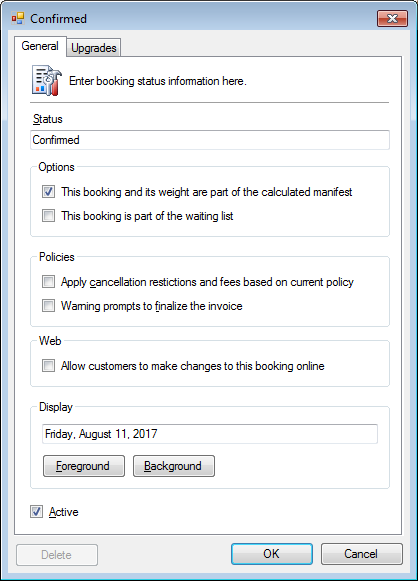
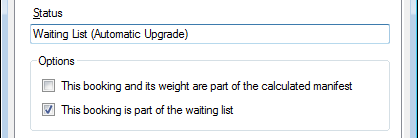
- Set the Options section.
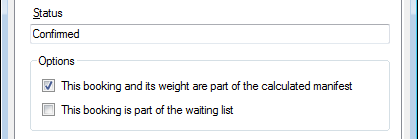
This booking and its weight are part of the calculated manifest when the booking status is Confirmed and is considered part seat and weight calculations.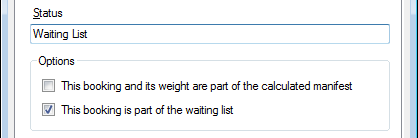
This booking is part of the waiting list when the booking status will be considered part of the Waiting or Standby list. - Set Policies options.
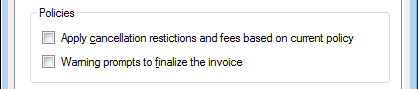
Apply cancellation restrictions and fees based on currency policy should be applied to cancelled and no show bookings.
Warning prompts to finalize the invoice should be applied to no show bookings. - Set the Web options.

Allow customers to make changes to this booking online is generally reserved for Confirmed bookings but there may be other scenarios where this is appropriate to the business model. - Optional. Set the Foreground and Background colors in the Display section.
These color codings will show up in the Manifest and the customer’s Bookings tab.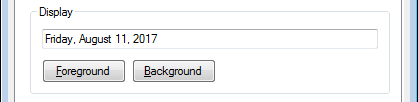
-
Set the Active checkbox.
-
Click OK.
Automatic upgrade from the waiting list
When a booking status is created for a Waiting List it is possible to automatically upgrade to a Confirmed or similar status when space becomes available.
- Create or open the status.
- Click the Upgrades tab.
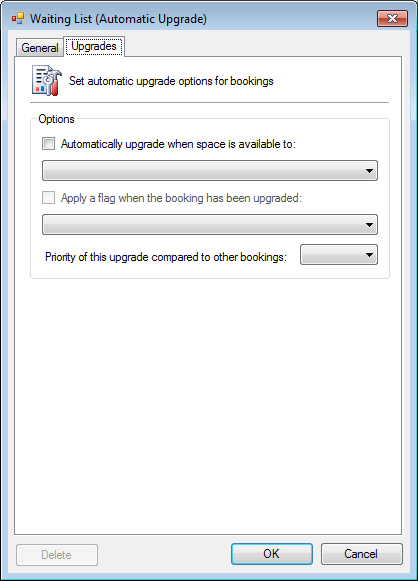
- Check Automatically upgrade when space is available to and set the upgraded status.
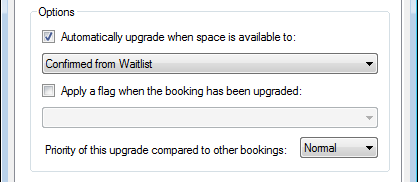
- Optional. Check Apply a flag when booking has been upgraded and set a flag for tracking purposes.
- Optional. Set the Priority of this upgrade compared to other bookings. The higher the priority means the booking will be upgraded faster over lower priority bookings. However, a lower priority item may be upgraded sooner if the weight exceeds the open weight of the higher priority status.
- Click OK.
Setup a luggage status
Examples
- Checked In
- Waiting List
» Status in Luggage anatomy
- Click Tools > Operations > Status > Luggage.
- Click <New Item> from the Status drop-down list.
- Enter the Status name.
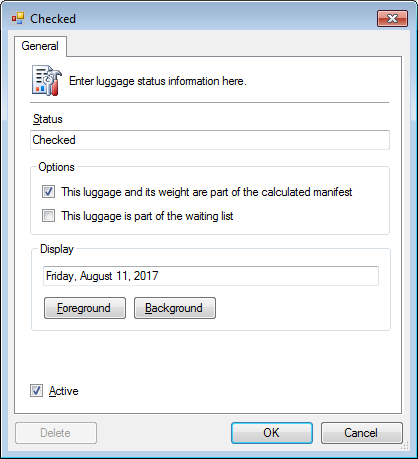
- Set the Options section.
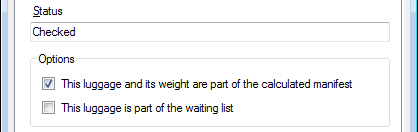
This luggage and its weight are part of the calculated manifest when the luggage status is Confirmed or Checked and is considered part of the overall weight calculations.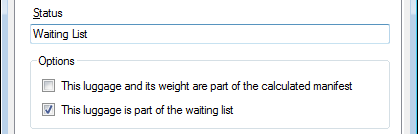
This luggage is part of the waiting list when the luggage status will be considered part of the Waiting or Standby list. It will not be manifested on the schedule. - Optional. Set the Foreground and Background colors in the Display section.
These color codings will show up in the Luggage list and in the Booking. -
Set the Active checkbox.
-
Click OK.
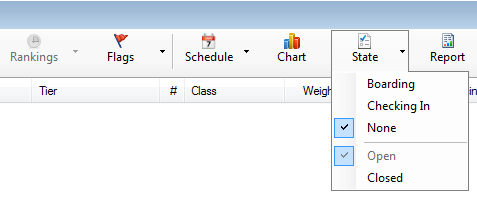
Setup a state
The state can used by operations to indicate to employees where along the check in and boarding process is for a schedule.
The states can be defined to match your business model.
Examples
- Checking In
- Boarding
- Aircraft Ready
- Baggage Loaded
- Waiting for Crew
- Departed
- Click Tools > Operations > Status > State.
- Click <New Item> from the Status drop-down list.
- Enter the Status name.
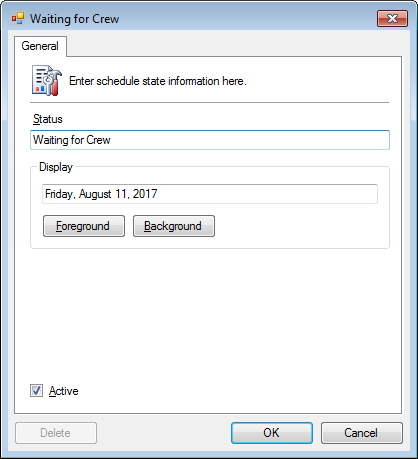
- Optional. Set the Foreground and Background colors in the Display section.
These color codings will show up on the Manifest. -
Set the Active checkbox.
-
Click OK.
From the Manifest
- Click State.