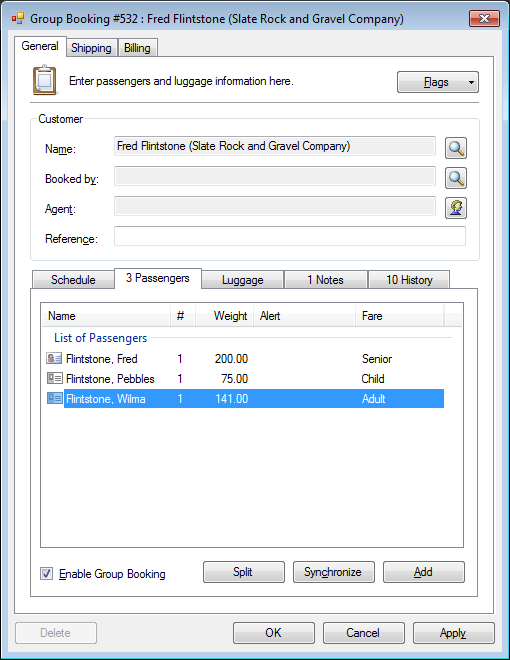
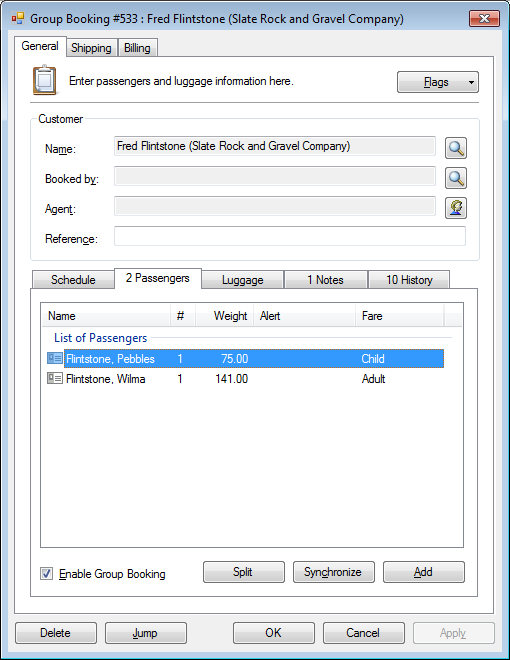
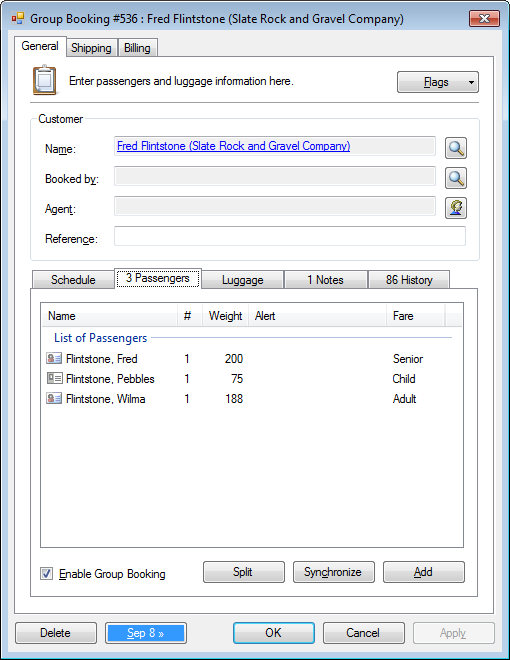
Group bookings can easily handle passengers with seat and fares differences.
» Add a passenger to the group booking
» Remove passenger from a group booking
» Synchronize billing for a group booking
» Split a group booking
» Mark a passenger as checked in for a group booking
» Tip: Holding seats for a group booking
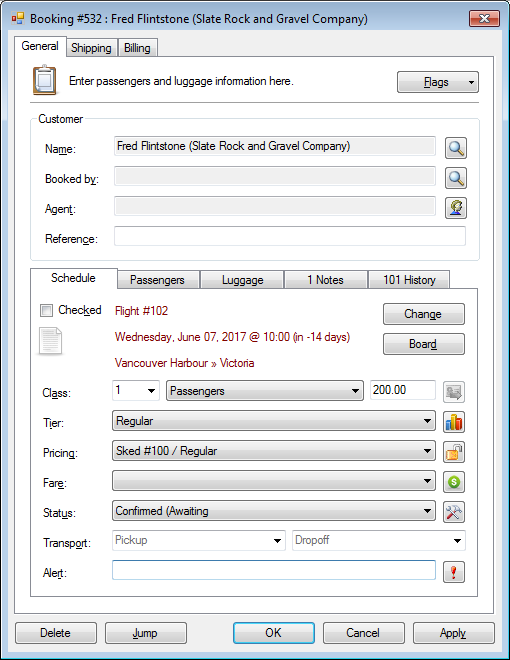
Setup a group booking
- Open a booking.
- Click the Passenger tab.
- Check Enable Group Booking.
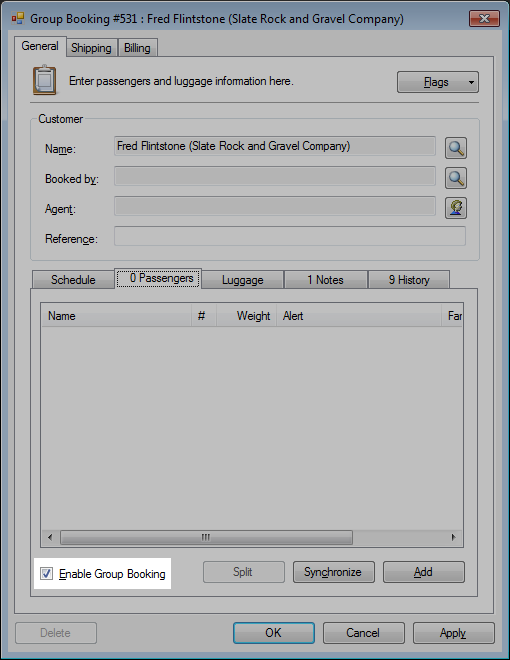
- A new passenger window will automatically open if there are no passengers already listed.
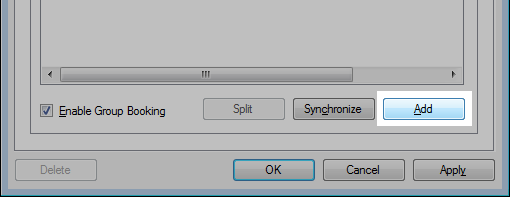
Add a passenger to the group booking
- Click the Passengers tab.
- Click Add.
-
The passenger details window will open.
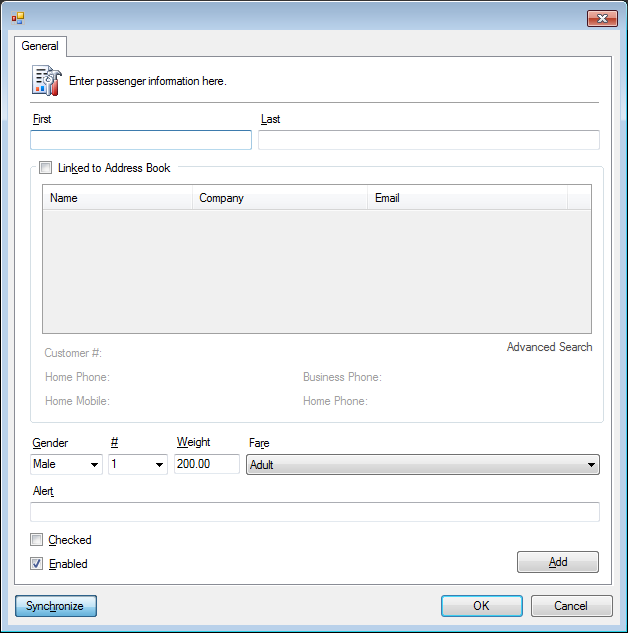
- Enter the First and Last name of the passenger.

- Optional. Check Link to Address Book.
This allows a customer profile to be directly linked from the address book.
The individual passengers can view this booking online, although they cannot make changes.
The booking can also be easily looked up from the customer profile of the passenger.
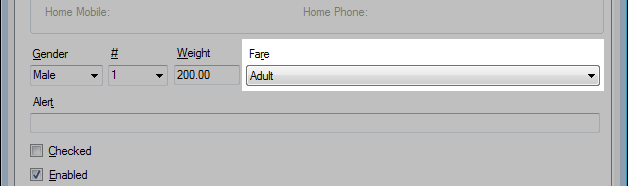
The individual weight and special fares (ie. Senior) will be applied automatically to the group booking.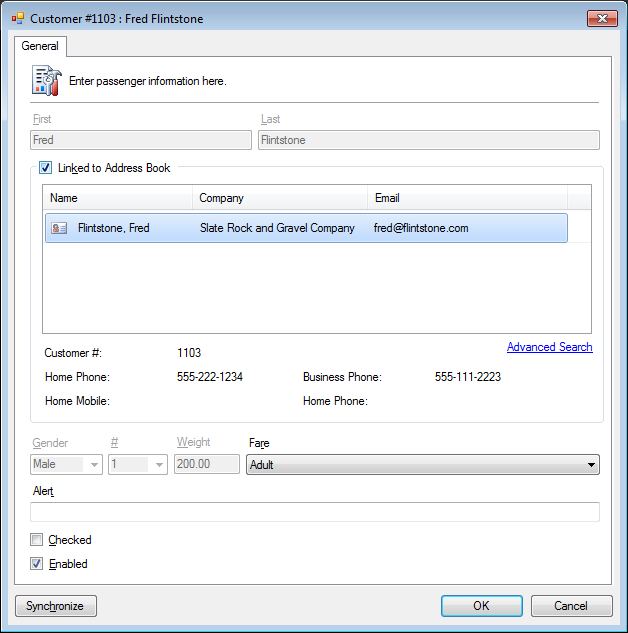
- Enter Gender, # of seats and Weight.
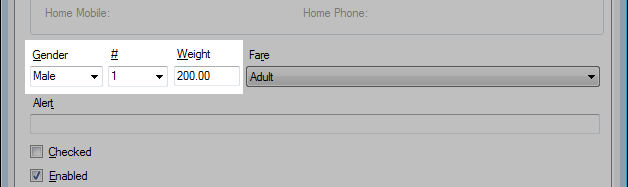
Gender may automatically determine the proper weight. - Set the Fare.
- Optional. Enter a Alert.
This alert is for internal warning or message which will display privately on the manifest.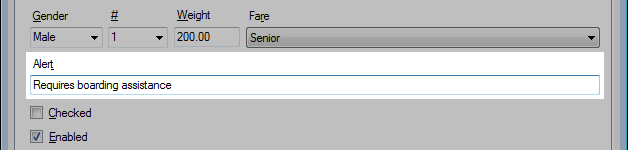
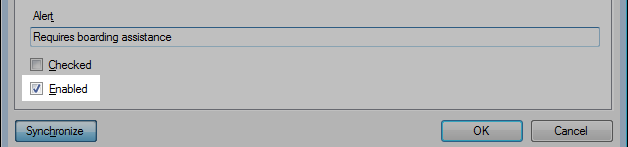
- Set the passenger as Enabled.
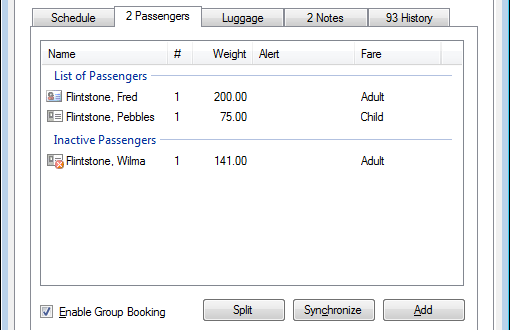
Remove passenger from a group booking
Disable the passenger
Disabling a passenger will remove the passenger from the manifest and billing but leaves them accessible and visible from the group list.
Disabling a passenger can be beneficial when the passenger may be added back later.
- In the Passenger tab, select a passenger to be removed.
- Press ENTER or double-click on the passenger.
The passenger details window will open.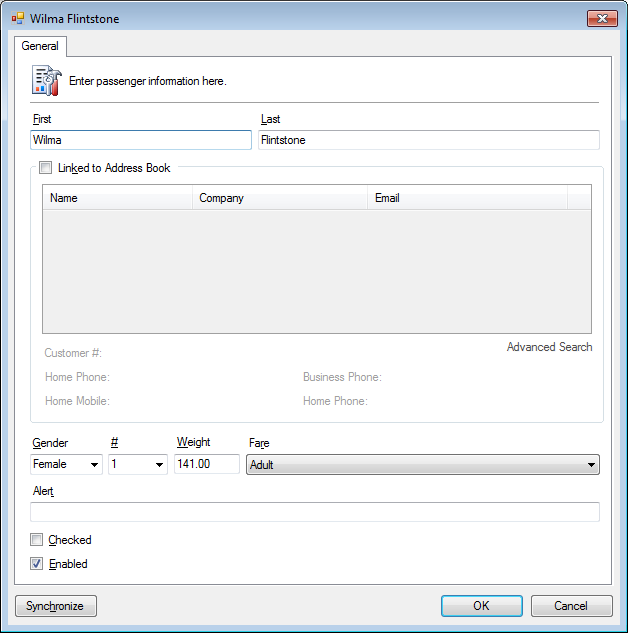
- Uncheck the Enabled checkbox.
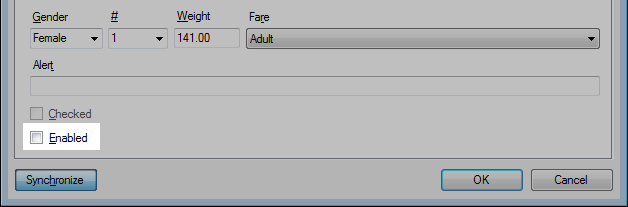
- Click OK. The passenger will be marked inactive.
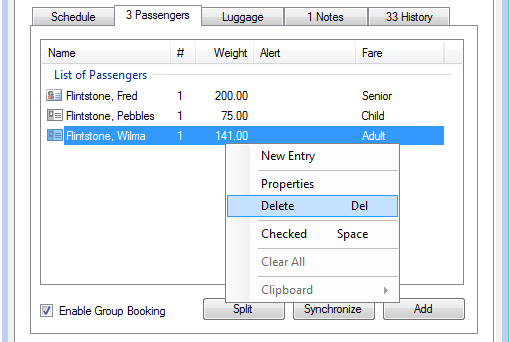
Delete the passenger
Deleting a passenger will permanently remove them from the group.
- In the Passenger tab, select a passenger to be removed.
-
Press DELETE or right-click on the passenger and click Delete.
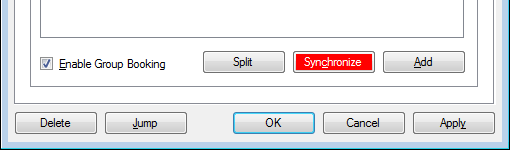
Synchronize billing for a group booking
The billing will synchronize automatically whenever possible.
-
In the Passenger tab, click Synchronize.
 There are times where it may be required to manually synchronize the billing.
The Synchronize button may appear in a warning color indicating the billing may need updating.
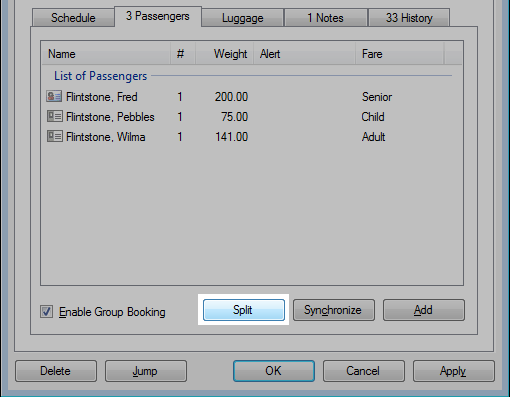
Split a group booking
A group booking may require being split for billing purposes or when one of the passengers needs to be moved to another schedule.
- In the Passenger tab, click Split.
- Check the passengers you wish to move off the current booking.
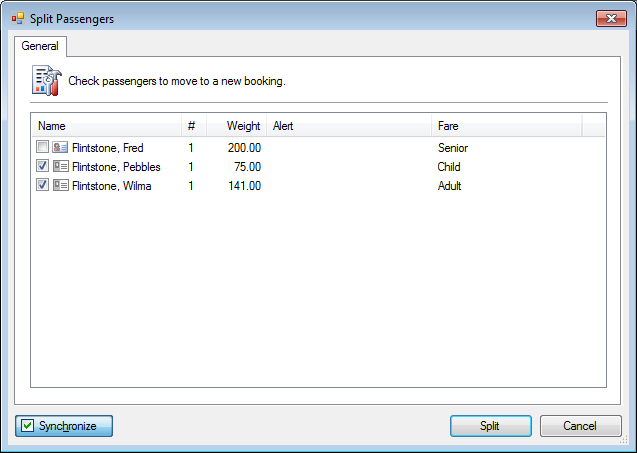
- Click Split.
- A new booking will automatically be created with the selected passengers.
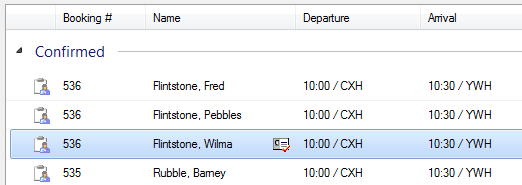
Mark a passenger as checked in for a group booking
There are times when marking an individual passengers as checked in before the other passengers in the same booking arrive can be valuable when tracking passenger flow.
- Open a booking.
- Click the Passengers tab.
- Select the passenger and press SPACE or right-click and click Checked.

- Click OK.
- The manifest will show the individual passenger marked as checked in.
Tip: Holding seats for a group booking
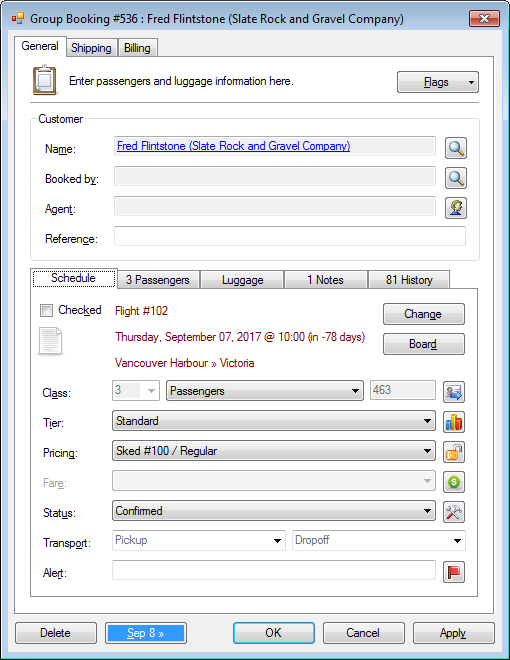
There may be times when you need to quickly reserve a number of seats and enter the individual passenger details at a later date.
- Open a booking.
- Set the # of seats and weight.
Set the value to the number of required seats and weight for the group.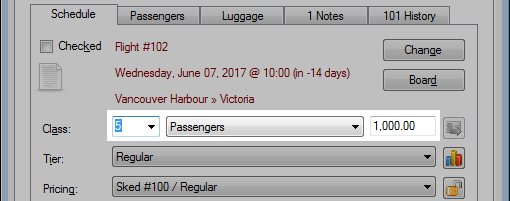
- Optional. Set the Status to option which reflects the state of the booking.
This can be helpful for staff when they come across a booking which is incomplete.
- Once the passenger list is ready for entry, proceed with the group booking setup.
» Setup a group booking