Groups track customer profiles for downstream reporting and integrations.
Examples
- Newsletter
- Special offers
- Executive customers
- Executive shipper
- Tour operator
- Film industry
» Setup a group
» Find all members
» Export to Excel
» Scenario: Setup all new customers with the Newsletter group
» Find all members
» Export to Excel
» Scenario: Setup all new customers with the Newsletter group
Additional resources:
» Create a contact | Add a contact to a group
» Create a contact | Add a contact to a group
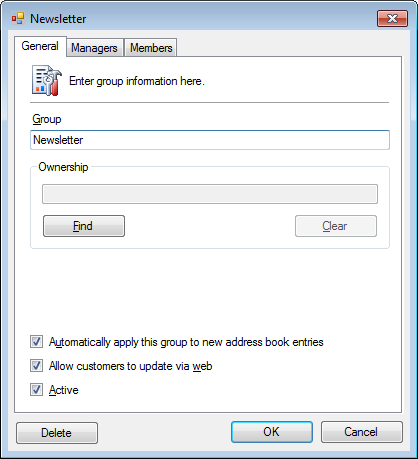
Setup a group
- Click Tools > Operations > Groups.
- Click <New Item> from the Group drop-down list.
- Enter the Group name.

- Optional. Find and set the Ownership of the group.
- Optional. Check Automatically apply this group to new address book entries.
- Optional. Check Allow customers to update via web.
- Set the Active checkbox.
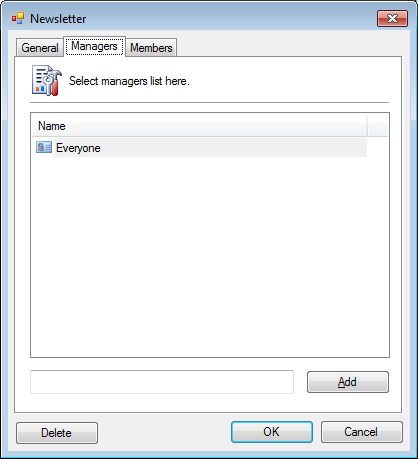
- Optional. Click the Managers tab and add employees with permissions to add/remove customers from this group. Default is Everyone.
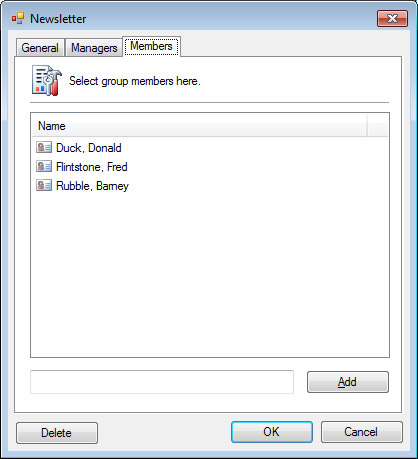
- Optional. Click the Members tab and add/remove customers from this group.
- Click OK.
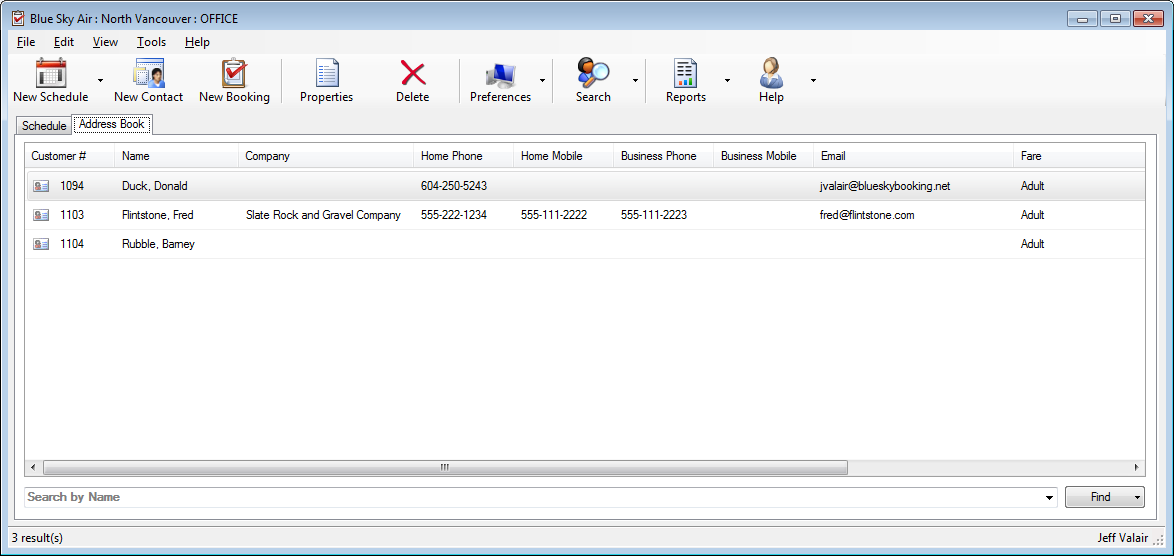
Find all members
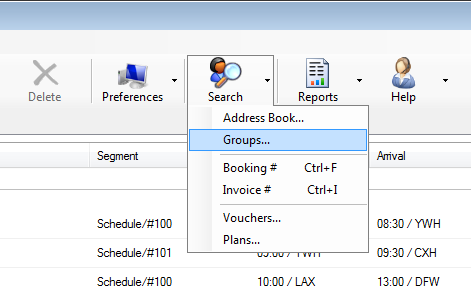
- Click Search > Groups.
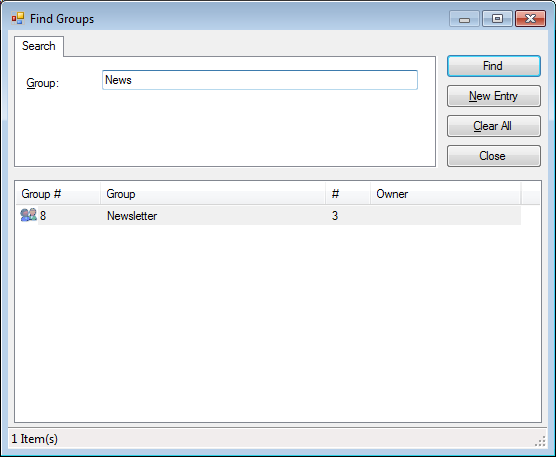
- Find and Select the Group.
- The Address Book tab will list the results.
Export to Excel
- Run the steps in Find all Members.
- Right-click in the Address Book results window.
- Click Export All > CSV.
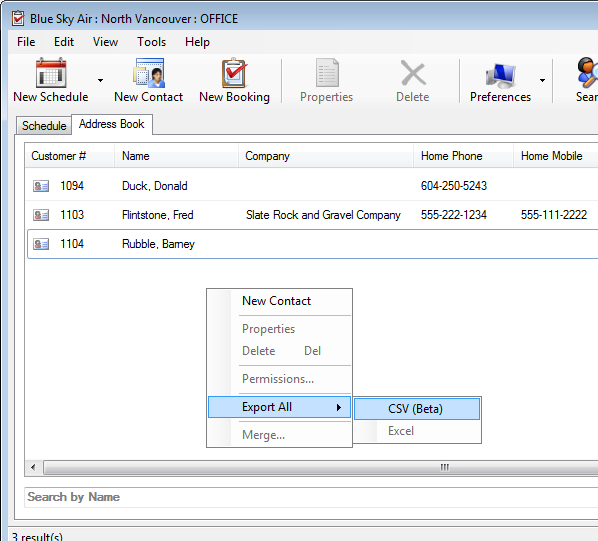
- A prompt to save the .csv file will open.
Scenario: Setup all new customers with the Newsletter group
- Click Tools > Operations > Groups.
- Click <New Item> from the Group drop-down list.
- Enter Newsletter in the Group field.
- Check Automatically apply this group to new address book entries.
- Check Allow customers to update via web so they can unsubscribe from the group online.
- Click OK.