A schedule must be active for bookings.
» My First Schedule
» My First Schedule
Let’s create a new booking!
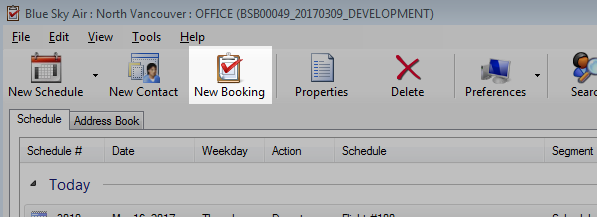
- Click New Booking on the toolbar in the main window. The Find Availability window will open.
-
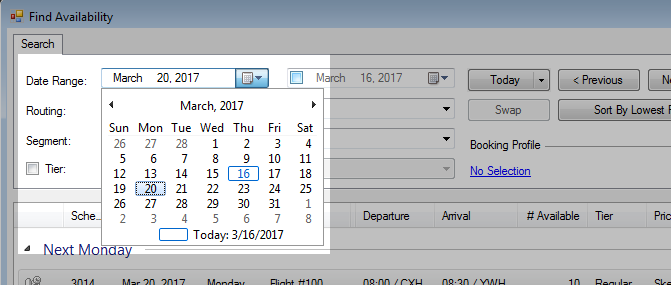
In the Search tab for the Date Range field, enter the Departure Date.

- Optional. Press ALT + D or click on the calendar icon (right side) to bring up the date selection window.
-
Optional. Check off the second date field to search a departure date by date range.
In this example, March 20, 2017 until March 25, 2017.
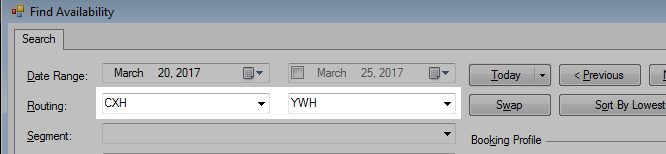
- Optional. Enter the departure and arrival locations in the Routing section.
-
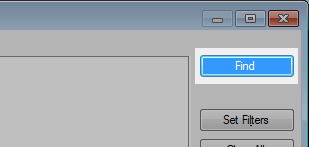
Click the Find button.
- The results window will display booking availability.
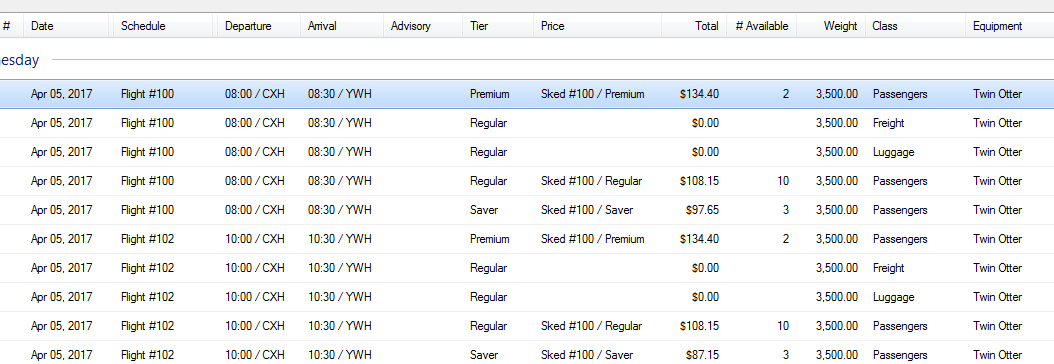 You may wish to only view the Passenger and/or Freight classes.
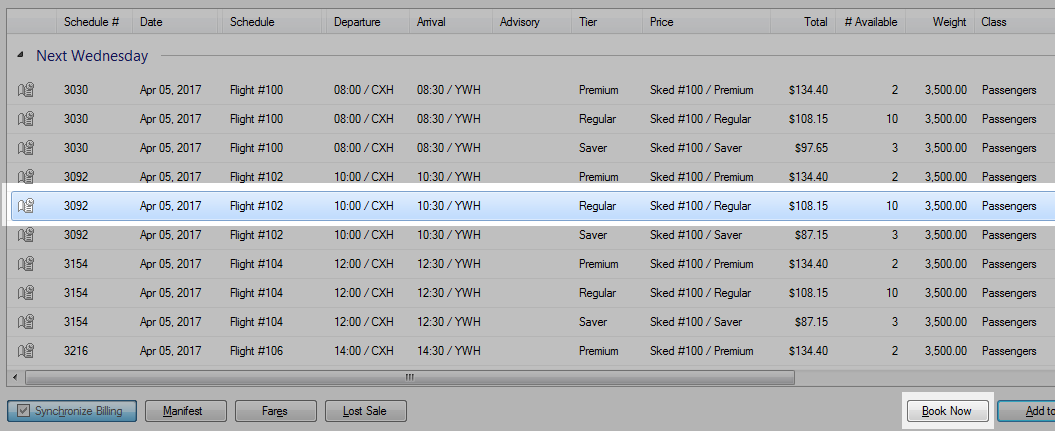
» Find Availability Filter - Highlight a route and click Book Now.
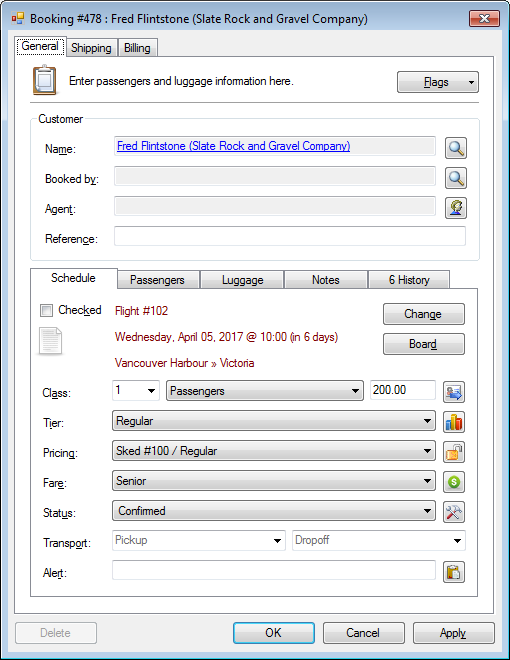
- The Booking window will open.
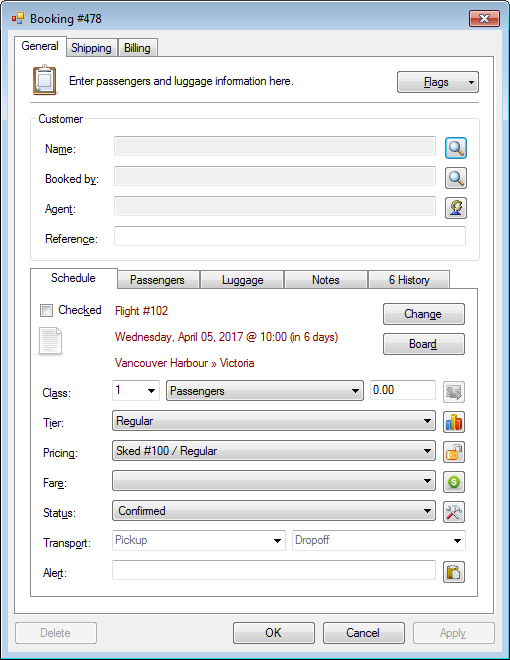
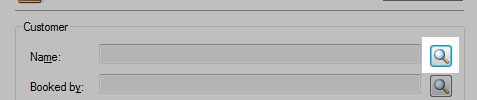
- Click the Name search button or press ALT + M. This is the minimum requirement to create a booking.
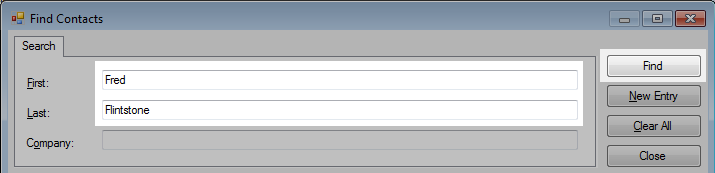
- In the Find Contacts window, enter the First and Last name and click Find.
- Highlight the customer and click Select.
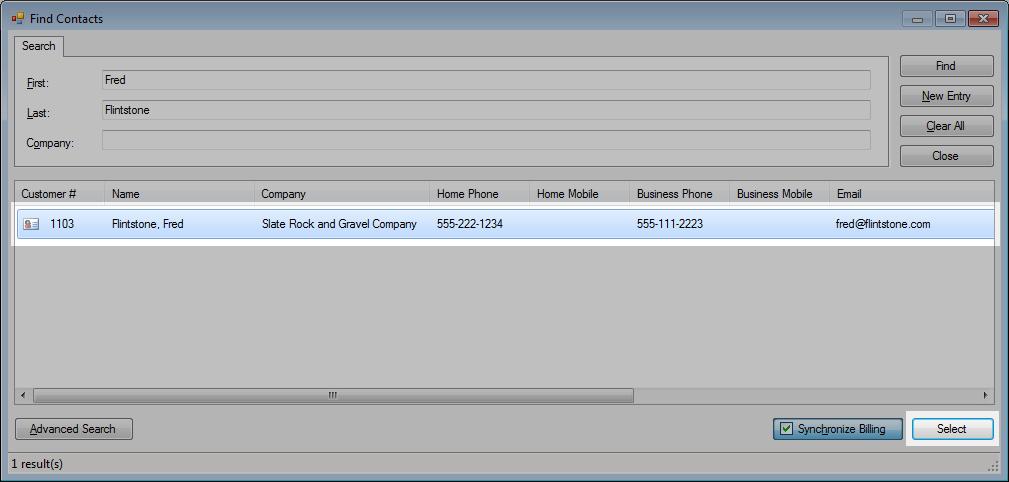 If the customer does not exist, you can click New Entry to create a new profile.
» Creating a new customer - Click OK to save this new booking.